Unimat 3 Lathe - Dremel Milling Attachment
Updated 13 April 2024
Updates: Carriage-Stop
Contents
Use the browser "back control" to return here.
- Introduction
- Emco Unimat 3 Lathe, Specifications, Digital Readouts, Lathe Accessories, Lathe Projects
- Dremel Milling Attachment, Milling Accessories, Simplified Milling
- Motor Replacement
- Carriage-Stop
- Low Cost Lathes

Introduction
I purchased an Emco Unimat 3 lathe in 1979 at the World Trade Fair in Wellington, New Zealand. The exhibitor was Grossmans General Engineering Suppliers. This particular lathe had some slight cosmetic damage owing to a light contact of the chuck with the edge of the cross-slide during a demonstration. I was able to get this lathe, plus accessories, at a substantially reduced price. The Emco Unimat 3 is a complete small lathe.
Over the 44 years I have had this lathe I made good use of it, making small parts for electron microscopes, optical microscopes, mass spectrometers, rain gauges, bikes, weaving looms and a collection of small tools for the workshop.
Emco Unimat 3 Lathe
Specifications
- Length - 450 mm.
- Weight - 7 kg.
- Distance between centres - 200 mm.
- Swing over the bed - 92 mm.
- Centre height - 46 mm
- Centre height above the cross-slide - 23 mm
- Cross-slide travel - 52 mm
- Spindle hole diameter 10.2 mm.
- The spindle speed can be set from 130 to 4000 rpm.
- Tailstock spindle travel - 23 mm
Digital Readouts
I added a low cost Mechpro Blue Digital Tread Depth Gauge from Repco to monitor the cross-slide. The gauge is shown at right, photo 1. Similar gauges are available online at low prices. These gauges have the same resolution but slightly less reading stability. The error in 11 readings, at 1 mm intervals, is 3 times greater than with the Mechpro gauge. The Mechpro readings are reliable to within about +/- 0.015 mm.
The gauge was mounted to the right-hand side of the cross-slide. A small magnet was glued onto a rigid triangular tab, made from a paper clip. It attracted a ball-bearing, drilled and mounted, on the gauge probe tip. It takes much more force than the gauge applies to move the magnet more than 0.01 mm. I get a working range of about 28 mm with a resolution of 0.01 mm.
The Mechpro gauge now has two sets of magnets shown at right, photo 2. The gauge can occupy either the cross slide position or the lathe bed position. This reduces clutter. If I require both measurements I can borrow the digital gauge from my South Bend lathe, as shown above. This gauge attaches magnetically to the front V-guideway of the lathe bed and can be slid along to suit. A magnet glued to the right-hand side of the saddle attracts a ball-bearing attached to the probe of the gauge.
The gauge magnets are mounted on a custom steel backing plate. For the strongest attraction one magnet has the North attracting-pole facing out while the other magnet has the South attracting-pole facing out. This creates a single flat, but very strong, magnet.
The digital gauges will sleep after an imprecise 6 minutes, if undisturbed, and they wake up when there is any probe movement. The previous reading is remembered and the new movement is added to the display. This mode of operation is unusual and very convenient.
The gauges can be easily lifted off if they get in the way. The gauge mounting positions are well away from most cutting debris. I spent about $30 on the digital readouts, including the magnets. The gauges are shown above and at right, Photos 1 to 3.
I originally used a dial-gauge to monitor the cross-slide but it did not fit well with a small lathe. I also used it to monitor the diameter and centering of chuck mounted work. A dial-test indicator is a more appropriate tool for centering when using the four-jaw chuck.
Lathe Accessories
I made a spring loaded tap centering tool for accurate threading. It fits in the tail-stock drill chuck and applies pressure onto the back of a tap holder to keep it centered. The tap holder is modified with a conical dimple machined on the back. The tap centering tool is 63 mm long and the ball is 7.5 mm in diameter, Photo 4.
Mostly I use the three-jaw chuck, taking care that the mounted work is nearly true before doing any cutting. The small soft-face hammer shown at right can assist with any final adjustments, with the aid of a dial-test indicator. The head of the hammer was made from old plumbing parts. The three-jaw chuck is accurately made but friction may hold a part slightly out of line. I use a dial-gauge to find the high point. One or two light taps with the hammer can improve the concentricity. The hammer is 190 mm long, Photo 5.
A stand for my small Dial Test Indicator was made from recycled parts. The base was part of a magnetic paper clip. The arm was machined with a ball at each end using a form-tool ground to shape with the Dremel. The knobs were recycled from an old amplifier. The remaining parts were recycled from an old soldering stand. A simplified version uses an inexpensive camera ball-joint secured directly to the cross-slide T-slot, Photos 6 to 9.
I made a little gauge, with a magnetic base, which allows the cutting tool height to be set at 23 mm above the cross-slide. This gauge is shown at right, Photo 10.
Shims could be stuck to the base of each cutting tool so the cutting height was the same for all tools. This would be almost as convenient as a quick-change tool-post.
I glued some magnets on the lathe bed to hold some tool bits, a centre-drill and a few lathe tools shown at right, Photos 11 and 12.
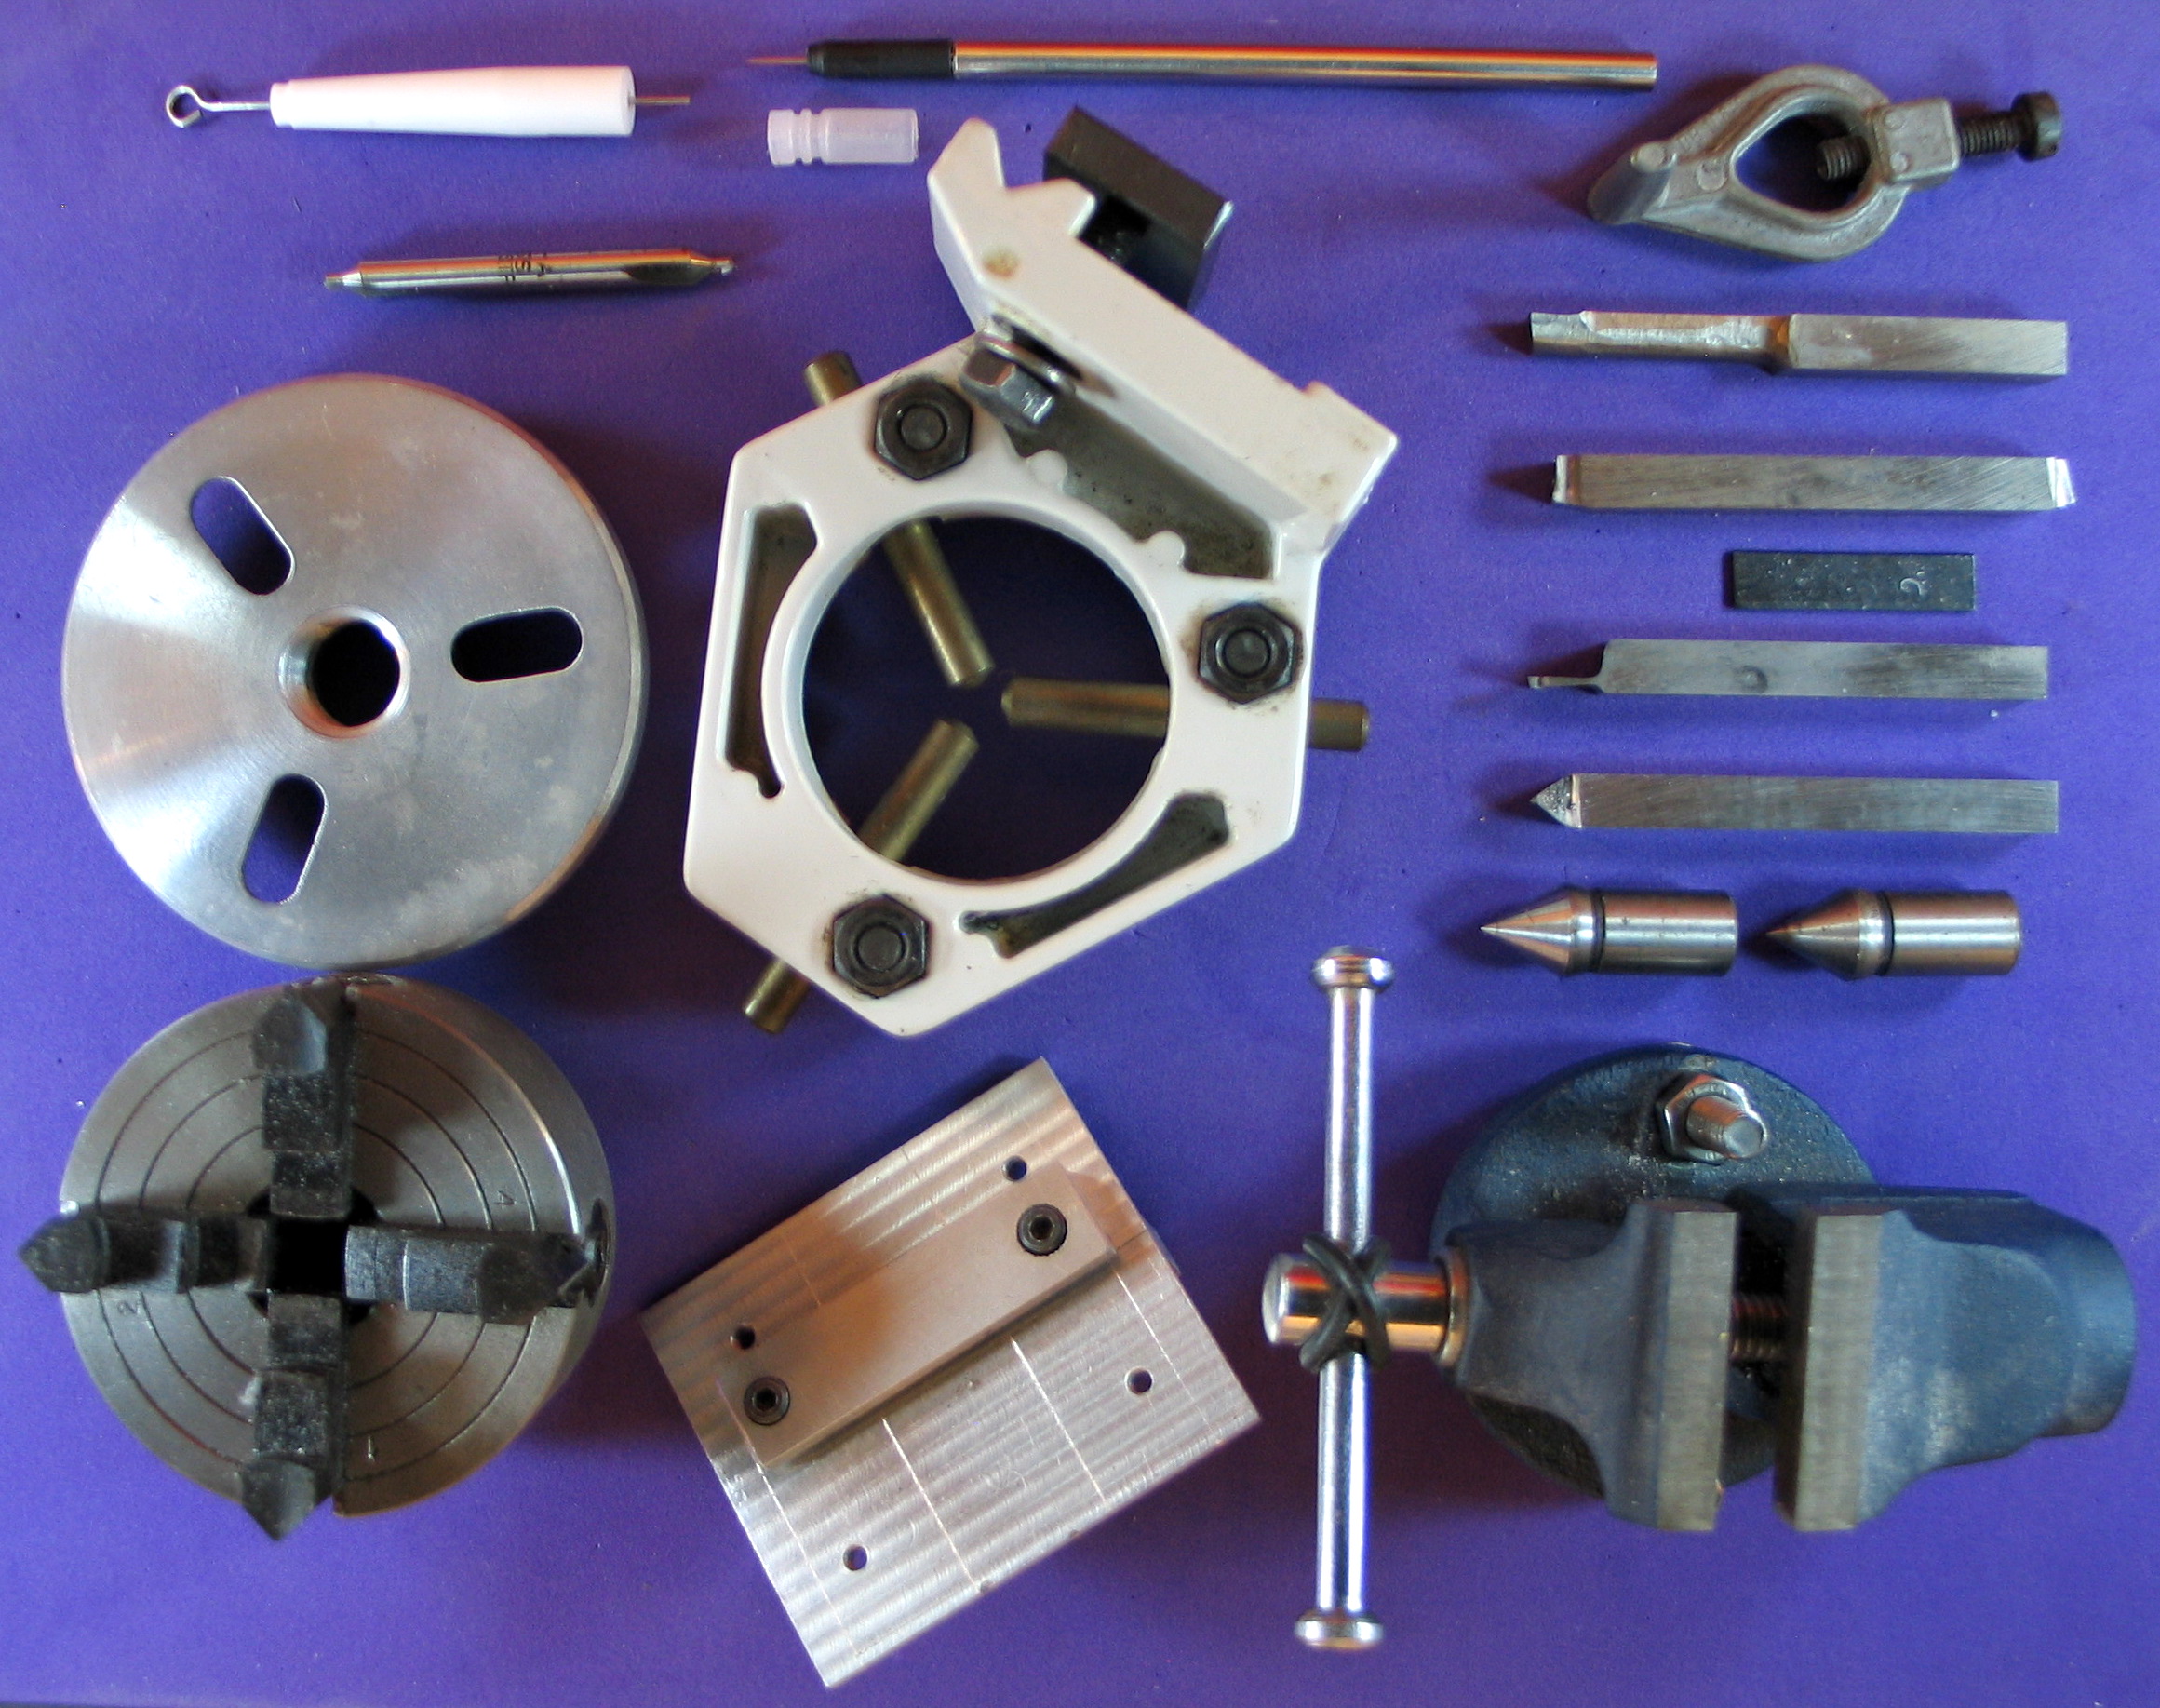
The photo below shows, from top left, a range of accessories including a depth gauge, a scriber made on the lathe, a lathe-dog, a range of cutting tools, two dead-centres, a machine-vice, a milling table with a work clamp made with the Dremel milling attachment, a four-jaw chuck, a face-plate, a centre-drill, and a steady-rest in the middle.
For me, the basic lathe is sufficient for most needs. The top-slide, for taper turning, looks a bit light-weight to me, so I don't have one. For decorative tapers I can always follow a paper template. In this case the power-feed gear is helpful.
I have a four-jaw chuck for accurate work The three-jaw Jacobs style drill chuck is also accurate and it easily mounts onto the head-stock. This is also a good substitute for an expensive collet set. For holding threaded parts the collet set is better.
I don't have any threading attachments as a good tap and die set is sufficient for my needs. I use the lathe tail-stock as a support for accurate threading. In many cases already cut threads on nuts and bolts can be added with some accurate press fitting.
Lathe Projects
Some of my lathe projects are shown at right.
I made some tapered nozzles from machinable wax to fit into some rain gauge funnels, Photo 13.
A small membrane inlet for my ion pumped mass spectrometer uses a washer, to trap and seal the membrane edges, Photo 14. Gas enters the mass spectrometer via the hole in the washer. Gas admission is mainly through the membrane and slightly through the compressed membrane edge.
Two small file handles were made on the lathe. Three drill sizes were used to make partially tapered holes for a good fit, Photo 15.
A microscope light, used for sub-stage illumination, was made by modifying an LED camp light, Photos 16 to 18. It now has an intensity control and is powered from any USB port. I machined two smaller apertures to improve the image contrast at higher magnifications. The light is intended for use with vintage or inexpensive microscopes.
I made two quick adjusters for the four jaw chuck from two 4 mm square screwdriver bits and two old radio knobs. They allow rapid centering of the four-jaw chuck, with the aid of the dial-test gauge, Photo 19.
Dremel Milling Attachment
For milling I have a Dremel 3001 Rotary Power Tool mounted on a Dremel Rotary Tool Workstation. The workstation is essentially an adjustable drill press and a stable support for the Dremel Rotary Power Tool. The base was removed and the remainder mounted rigidly onto the lathe base, using a mounting collar made on the lathe. It uses a micrometer barrel to hold the cutting depth precisely. The micrometer bears onto an embedded ball bearing at the top of the drill press quill.
I made the mount for the micrometer with the Unimat 3 lathe and the Dremel mill. The micrometer can also be mounted below the Dremel to act as adjustable drilling stop, although there is a good one built into the Dremel Workstation.
There are two small locking screws near each end of the Dremel Workstation quill, on the left. Doing these up, after the cutting depth is set, makes the Dremel much more rigid. The normal setting has the screws backed off slightly. There are two more screws, supporting the depth stop rod, which can be adjusted in the same way.

There is a machine-vice which attaches to the cross-slide of the lathe. The cast iron jaws of the machine-vice were levelled by milling a shallow cut across the top. The flat milling table, shown above, was made with the milling attachment. The table was clamped in the levelled machine-vice for milling.
Milling Accessories
I also milled a range of work clamps for the milling table. There are a number of tapped holes in the table to allow the use of several clamps at the same time. The photo below shows a range of Dremel tool bits at left. In the middle are some clamps for holding work on the milling table. At top right there are six collets and two collet-chucks.

The Dremel milling attachment is intended for work with materials like polycarbonate, Acetal, Nylon, Teflon, machinable wax, wood, and aluminium. Light cuts are required as the Dremel is not as rigid as a normal milling tool and there is limited torque available. The rotation direction of the tool bit at the work surface and the advancement direction of the work should be opposite to prevent the tool bit grabbing the work piece.
The Dremel 3001 has an unloaded slow speed of about 5000 rpm. The maximum speed is about 35000 rpm. The torque is much lower than with a normal milling setup, so light cuts are needed, perhaps at a higher speed than usual.
The Dremel can keep tools sharp, with a light touch from an abrasive stone or a diamond tool. The Dremel is moved on the supporting pillar so it can be inserted into a paper cup behind the tail-stock. The cup shields the lathe from any abrasive particles. An aperture in the side of the cup allows a tool to be inserted for re-sharpening. The Dremel is also used for finishing work. The setup is shown at right, Photo 20.
Simplified Milling
I found that milling makes an awful mess. My alternative is a file with a magnetic bubble level attached. This is ideal for making accurate flats , etc. The bubble moves around, but you can get an average position. Alternatively a file rest with rollers could be used.

Motor Replacement
After 44 years of use, the electric motor on my Unimat 3 failed. The failure was a blown motor capacitor. While easily replaceable, I was concerned that the failure might be caused by a short-circuit elsewhere. Also, the insulating surfaces inside were well coated in conductive carbon from the brushes.
I upgraded with a 120 watt. 12 volt dc, motor and a pulse-width-modulated (PWM) speed controller. I deliberately chose a motor that was not too powerful as I did not want to stress the lathe. A typical use for this motor is powering small electric scooters
The PWM speed controller can handle 9 to 60 volts input and can deliver currents up to 20 amps. To run an electric motor off such controllers, a conservative specification is required, as motor start currents can be high. There was room inside the controller box to fit the speed-control potentiometer and a reversing switch.
The Unimat 3 motor pulley was drilled out so the left-hand threaded shaft-nut from the new motor could be lightly pressed inside. The pulley was installed with a spacer ring on the shaft and screwed anti-clockwise into place. The three mounting screws for the new motor fitted through the original motor mounting slots.
I run the lathe motor from a variable power supply, set to 12 volts. The power supply current is limited to a maximum of 3 amps. A higher current setting might be needed, but not for the size of work I am doing. If I really wish to shorten the lathe's useful life, I have another power supply that can deliver more than 10 amps. I do have a larger lathe.
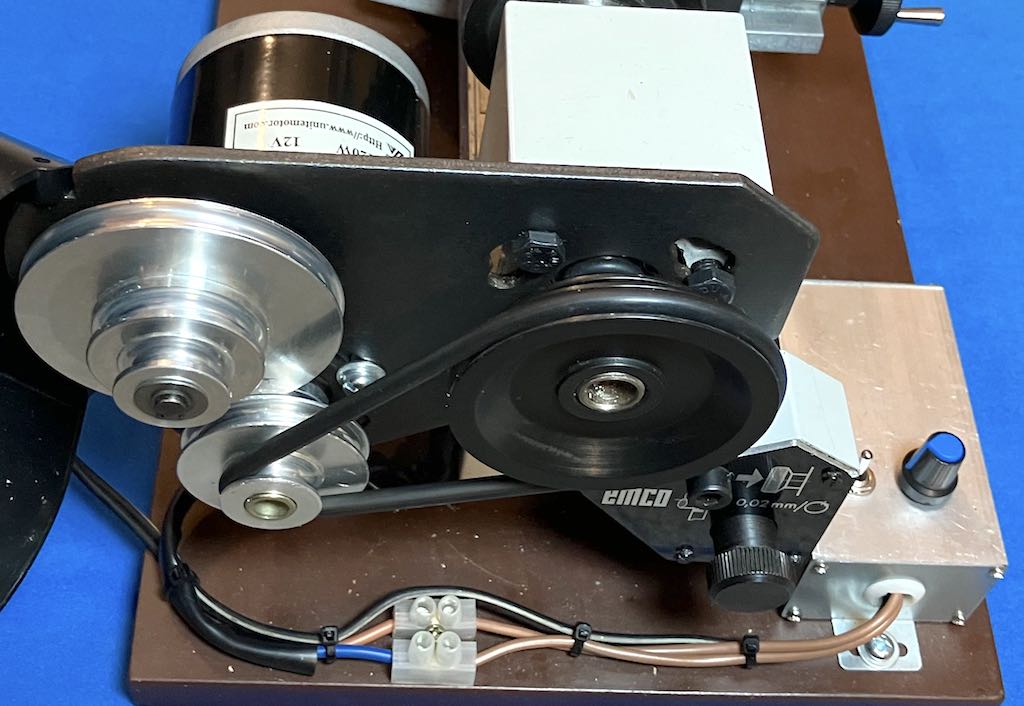
12 Volt 120 watt Electric Motor and a 20 Amp PWM Speed Controller
Carriage-Stop
A carriage-stop is often used to allow accurate facing cuts to be made on multiple parts. It can also prevent collisions with the chuck.
Shown below is my simple carriage-stop. I drilled and tapped a 30 mm length of 6.5 mm diameter aluminium rod. The hole size was 3.5 mm to a depth of 20 mm. I used a 4 mm diameter, 0.7 mm pitch tap.
The 4 mm bolt is 25 mm long. The head was machined down to a diameter of 6 mm. I also machined a 4 mm lock-nut to the same diameter. A 3.2 mm bicycle ball-bearing was secured with araldite in a suitable hole so that about 1.5 mm protruded. This avoided conflict with the cross-slide.
The carriage-stop was mounted on the front lathe-bed rail and slid back to touch the headstock. I used a cable tie to secure the carriage-stop to the bed. At the left-hand end I used a drop of super glue to secure the left-hand end to the headstock. Double sided tape should be sufficient.
In use, the carriage is positioned at its required setting. The bolt is screwed out until it touches the carriage. The lock ring is tightened with the fingers to secure the bolt.

Carriage Stop
Low Cost Lathes
In 2023 there are different choices of mini-lathes which are good value. Metric or non metric versions are available. Sherline lathes are popular. There is a wide range of mini-lathes from various brands with similar specifications. A Toolshed Mini Engineers Lathe is one metric rebranded lathe available in New Zealand. Another lathe available in New Zealand is the TU-1503V Opti-Turn Bench Lathe from Machinery House. The links at right will help to find other brands.
Another option is to recycle and update an old lathe. I have an old 9 inch model C, South Bend lathe, which is perfect for larger work. It has standard change gears, a screw feed, a taper attachment and a spindle hole 3/4 inches in diameter. It does not matter too much to me that the lathe is calibrated in inches. A metric digital tyre gauge is used to monitor the cross feed. A modified plastic 150 mm digital calliper does the same for the carriage movement. Alternatively the work can be fully marked out before machining. Marking blue or a marker pen can be used as a strong background colour before scribing the reference lines.
JEP Links
JEP Related LinksArts & Letters Daily
BBC News - Home
Radio New Zealand News Headlines
ScienceNews
ScitechDaily
Spike.News
Universe Today
xkcd
Machinery
Frets.com MachiningGadgetBuilder's MiniLathe Site
Lathes
Manufacturing Process
mini-lathe.com home page
The SBL Workshop - Home
The Taig Lathe and Milling Machine
Machinery Video Blogs
Ades WorkshopClickspring Projects
doubleboost
Jon's Workshop
Latheman's crazy machines
mrpete222
Occasional machinist
Xynudu
Click the photos below to enlarge. Use the browser "back control" to return.
 (1) Mechpro Digital Readout
 (2) Mechpro Digital Readout - Back
 (3) Digital Readout Magnet Detail
 (4) Tap Centering Tool
 (5) Small Soft-Face Hammer
 (6) Dial Test Indicator Stand
 (7) Dial Test Indicator Stand - Rear View
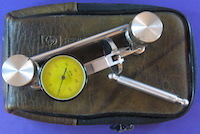 (8) Dial Test Indicator Stand - Folded
 (9) Dial Test Indicator Stand - Simplified
 (10) 23 mm tool height gauge
 (11) Tools Held With Magnets
 (12) More Tools Held With Magnets
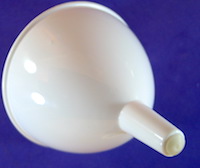 (13) Rain gauge Funnel Nozzle
 (14) Mass Spectrometer Membrane Inlet
 (15) Wooden File Handles
 (16) USB Microscope Light
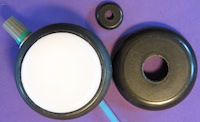 (17) USB Microscope Light
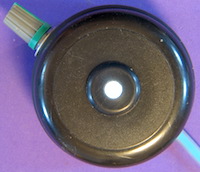 (18) USB Microscope Light
 (19) Four-Jaw-Chuck Quick Adjusters
 (20) Dremel Rotary Tool Shield
